


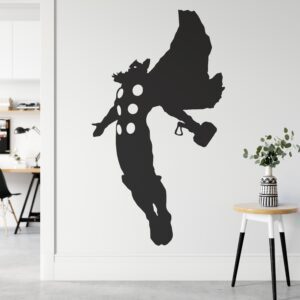



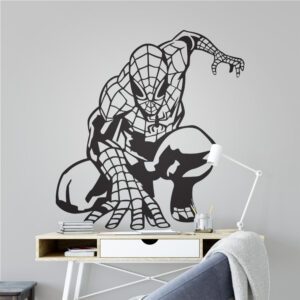
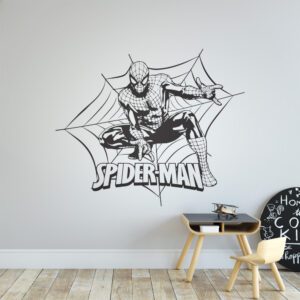


Are wall stickers safe for painted walls? In many homes, they can be a practical way to update a room without painting a mural or hanging framed artwork. However, suitability depends on more than the sticker itself. The age and quality of the paint, the wall texture, surface preparation and removal technique can all affect the result.
A self-adhesive vinyl wall sticker is designed to apply directly to a suitable surface. Most Apex designs are cut from one-colour vinyl, with no clear, white or printed background, so the finished design has a clean, painted-on appearance. Before buying, it is important to assess your wall rather than assume every painted surface will respond in the same way.
Quick answer: can you use wall stickers on painted walls?
Wall stickers generally work best on smooth, clean, dry and fully cured painted walls. A sound wall with well-bonded paint is more likely to provide reliable adhesion and a straightforward application. Problems are more likely when paint is fresh, flaky, chalky, damp, heavily textured or poorly bonded to the surface underneath.
There is no universal guarantee that a sticker can be removed without affecting paint. Removal results depend on wall condition, paint quality and how carefully the sticker is removed. If the finish is delicate, recently painted or already lifting, consider another decorating approach.
What you need before you start
You do not need a complicated toolkit, but you should check the wall carefully before applying a decal. Have the following ready:
- A clean, dry cloth: Use it to remove loose dust from the intended position.
- A suitable cleaning method: If the wall is greasy or marked, follow the paint manufacturer’s care guidance. Avoid leaving cleaning residue behind.
- Low-tack masking tape: This can help you temporarily position the design and judge its size. Test the tape first if the paint is delicate.
- A smoothing tool or firm card: Use gentle, controlled pressure during application, taking care not to mark the wall.
- The paint information: If possible, check the paint type, age and stated curing time.
- A small test piece: Testing in an inconspicuous area is sensible when you are uncertain about adhesion or paint quality.
Check whether the paint is fully cured
Paint can feel dry to the touch before it has fully cured. Applying vinyl too soon may reduce adhesion or make later removal more likely to affect the finish. Curing time varies by paint formulation, wall conditions, ventilation and room temperature, so follow the paint manufacturer’s guidance rather than relying on touch alone.
If you do not know when the wall was painted, inspect it for softness, tackiness or a lingering paint smell. When in doubt, wait longer or ask the paint manufacturer for advice.
Assess the surface and paint condition
A wall sticker relies on the top layer of paint remaining securely bonded to the wall. Look for peeling edges, bubbles, powdery residue, cracks, damp patches or paint that rubs away onto a cloth. These warning signs suggest that the surface may need attention before any self-adhesive decoration is applied.
Wall texture matters too. Light texture may reduce the area available for the adhesive to grip, while deep texture can prevent parts of the design from making contact at all. Very fine lettering and intricate details are particularly demanding because each narrow section needs consistent surface contact.
Step-by-step: how to apply a wall sticker safely and carefully
The following process helps reduce avoidable application problems. For a more detailed walkthrough, use our quick and easy wall sticker application guide before starting.
Painted-wall application checklist
- Inspect the paint — do not apply over peeling, damp, chalky or poorly bonded areas.
- Confirm the wall has cured — follow the paint manufacturer’s full curing guidance for freshly decorated walls.
- Clean the position — remove dust and contamination, then allow the surface to dry completely.
- Test an inconspicuous area — use a sample when the paint finish or adhesion is uncertain.
- Plan the position — hold the decal in place and check alignment before exposing the adhesive.
- Apply gradually — work in controlled sections and smooth from the centre towards the edges.
- Check every detail — ensure narrow vinyl sections have made contact before removing any application layer.
- Remove carefully later — peel slowly at a low angle rather than pulling sharply away from the wall.
1. Inspect the proposed position
Choose a smooth section of wall away from visible damp, loose paint and crumbling filler. Run a clean, dry cloth gently over the area. If the cloth picks up powder or flakes, the surface may not be suitable in its current condition.
Consider environmental conditions as well. A wall beside a shower, cooker, radiator or persistent condensation source may experience moisture, heat or grease that affects adhesion. A more stable interior wall is usually the better choice.
2. Clean the wall without leaving residue
Dust, grease, polish and cleaning products can create a barrier between the vinyl and paint. Clean only as needed, using a method suitable for the particular paint finish. The wall must be completely dry before you proceed.
Avoid applying a sticker immediately after wiping the surface. Moisture can remain even when the wall looks dry, especially in cooler rooms or on less breathable finishes.
3. Test if you are unsure
A small test helps you assess whether the vinyl adheres to the surface, but it cannot predict every future removal result. Place the sample in an inconspicuous area and leave it long enough to check whether the edges remain in contact. Remove it slowly and examine the paint.
If paint lifts, becomes marked or seems unstable, do not proceed with the full design. The issue may be the paint bond rather than the vinyl.
4. Position the design before applying it
Temporarily hold the wall sticker against the wall and check it from normal viewing distance. Confirm that it is level, visually balanced and clear of switches, sockets, shelves and areas of rough filler. Larger designs benefit from careful positioning because repeated lifting and repositioning can weaken adhesion or place unnecessary stress on the paint.
5. Apply the sticker gradually
Follow the instructions supplied with the decal. Work slowly and smooth each section with gentle, even pressure. Moving from the centre outwards helps reduce trapped air and wrinkles.
Do not stretch the vinyl. Stretching can distort the design and encourage edges to pull back later. If the sticker uses an application layer to hold separate pieces in position, make sure the vinyl has contacted the wall before slowly peeling that layer away.
6. Allow the adhesive to settle
Once applied, avoid repeatedly pressing, picking at edges or testing whether the sticker can be moved. Check that small details are secure, then leave the design undisturbed. A wall sticker should appear as individual cut-vinyl shapes on the wall rather than as a printed rectangle.
7. Remove it slowly when the time comes
Do not pull a decal sharply outwards. Start at an accessible edge and peel the vinyl back slowly at a low angle, supporting the process with your other hand if necessary. Stop if the paint begins to lift or the surface behaves unexpectedly.
Our careful wall decal removal guide explains the recommended approach in more detail. Remember: Removal results depend on wall condition, paint quality and how carefully the sticker is removed.
How different painted surfaces affect suitability
| Surface condition | Likely suitability | Main consideration |
|---|---|---|
| Smooth, fully cured paint in sound condition | Usually the best candidate | Clean and dry the area before applying. |
| Freshly painted wall | Wait before applying | Follow the paint manufacturer’s full curing time. |
| Lightly textured paint | May be suitable | Reduced contact can cause detailed edges to lift. |
| Deeply textured or rough wall | Often unsuitable | The adhesive may only touch raised points. |
| Matt or chalky finish | Requires caution | Loose surface material can reduce adhesion. |
| Peeling, cracked or bubbling paint | Unsuitable | The paint layer may detach from the wall. |
| Damp, greasy or frequently steamy area | Often unsuitable | Moisture and contamination can affect the bond. |
This comparison is a starting point rather than a guarantee. Two walls painted with similar products may behave differently because of preparation, age, underlying plaster and previous coatings.
Common mistakes to avoid
Applying to paint that is only touch-dry
Touch-dry and fully cured do not mean the same thing. Rushing the process can affect both initial adhesion and future removal. Always allow the complete cure period recommended for the paint.
Assuming every smooth-looking wall is sound
A wall can appear smooth while having a weak paint layer underneath. Check for powder, small bubbles, lifting around sockets and cracks near filled areas.
Using aggressive cleaners immediately beforehand
Household sprays, polish and soap can leave residue. Strong cleaning can also mark some matt paints. Use a paint-appropriate method and allow the wall to dry thoroughly.
Applying over texture, dust or damp
Pressing harder will not compensate for a contaminated or unsuitable surface. It may simply mark the wall while leaving the decal with inconsistent contact.
Choosing intricate lettering for a rough wall
Narrow strokes and small pieces have less adhesive area than large, simple shapes. If a surface has light texture, a bolder design may be more practical, although suitability still depends on the wall.
Pulling the sticker straight away from the wall
A fast outward pull places more stress on the paint. Slow, low-angle removal is the more controlled approach. If resistance increases or paint begins to move, stop and reassess.
Expecting a universal damage-free result
No seller can assess every layer beneath your visible paint. Poor preparation, old coatings and weak plaster can all influence what happens during removal. Treat claims of guaranteed damage-free removal cautiously.
When to choose a different product or approach
A wall sticker may not be the right choice in every room. Consider a different decorating method when:
- The wall has fresh paint that has not completed its stated cure period.
- Paint is peeling, chalking, bubbling or coming away from the plaster.
- The surface has heavy texture, exposed brick or rough render.
- The area is persistently damp, greasy or exposed to strong temperature changes.
- The paint finish is especially delicate or historically significant.
- You cannot test the finish and are unwilling to accept any removal risk.
- Your tenancy agreement restricts adhesive decorations.
Alternatives can include freestanding artwork, a design applied to a removable board, or decoration placed on suitable furniture or another smooth non-wall surface. Always check that the selected product is appropriate for that material before proceeding.
If the wall is suitable but you are uncertain about size, style or design complexity, consult the Apex wall sticker buying guide. It can help you choose a decal that fits the space without overwhelming the room.
Choose and apply your wall sticker with confidence
The safest buying decision starts with an honest assessment of the wall. If the paint is fully cured, secure, smooth, clean and dry, a cut-vinyl decal can provide a crisp decorative finish without a printed background. Browse the wall stickers collection to compare one-colour designs, then review the application guidance before committing the sticker to the wall.
Frequently Asked Questions
Can wall stickers remove paint?
They can affect paint in some circumstances, particularly if the coating is poorly bonded, fresh, flaky or delicate. Removal results depend on wall condition, paint quality and how carefully the sticker is removed.
How long should I wait after painting before applying a wall sticker?
Wait until the paint has fully cured, not merely dried to the touch. Exact curing periods vary, so use the paint manufacturer’s guidance for your product and room conditions.
Do wall stickers work on matt paint?
They may work on smooth, sound matt paint, but some matt finishes are chalky, delicate or difficult to clean. Inspect the surface and test an inconspicuous area before applying the full design.
Can I use a wall sticker on a textured painted wall?
Light texture may allow some designs to adhere, but results can be less reliable. Deep texture reduces adhesive contact and is generally unsuitable, especially for fine lettering or intricate details.
Are wall stickers suitable for rented homes?
Possibly, but check your tenancy terms and inspect the paint first. Even careful removal cannot guarantee that an unknown or weak paint finish will remain unaffected.
Ready to plan your room update? Read the wall sticker application guide for practical preparation and application steps before you begin.