



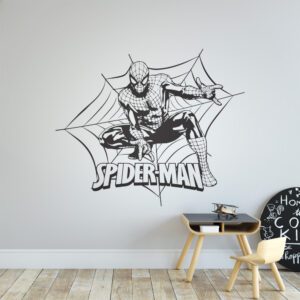


Fairy bedroom wall sticker ideas can turn a plain child’s room into an imaginative space without making every surface compete for attention. The most effective schemes use one clear focal decal, a controlled colour palette and a few supporting details. Because Apex fairy decals are cut from one-colour self-adhesive vinyl, they sit directly on the surface without a printed, white or clear background, creating a neat painted-on appearance.

Quick answer: how do you create a fairy-themed bedroom?
Start by choosing where the main fairy feature will sit: above the bed, beside a reading corner or on an open feature wall. Select a decal size that looks substantial without being crowded by furniture, then repeat one or two shapes or colours elsewhere in the room. Dark navy, charcoal or black decals create a crisp silhouette, while softer wall colours and warm lighting keep the room restful.
A fairy room does not need to be filled with themed accessories. One larger fairy wall sticker, paired with subtle stars, flowers, woodland details or personalised lettering, will usually feel more polished than several unrelated designs. You can explore the fairy wall stickers collection to compare poses, compositions and sizes before planning the rest of the room.
What you need before you start
A little preparation helps you choose a design that suits both the room and the available wall space. Before ordering or applying a sticker, gather the following:
- Basic wall measurements: Measure the usable width and height rather than the entire wall. Allow for headboards, shelves, sockets, switches and sloping ceilings.
- A photograph of the room: Looking at a photograph can make empty areas and visual clutter easier to notice.
- A simple colour palette: Choose one main wall colour, one vinyl colour and one or two supporting shades for bedding or accessories.
- A placement plan: Decide whether the decal will be seen mainly from the doorway, the bed or a play area.
- A suitable surface: Wall stickers work best on smooth, clean, dry surfaces. Texture, dust, damp, peeling paint and low-quality paint can affect adhesion.
- Enough curing time: Freshly painted walls should be allowed to cure fully before stickers are applied. Check the paint manufacturer’s guidance rather than assuming a surface that feels dry is ready.
- Simple application supplies: A clean, soft cloth and a low-tack positioning marker can help, provided the marker is suitable for the wall finish.
Fairy bedroom themes and where they work best
The right theme depends on the child’s age, the room’s existing furniture and how long you want the overall look to last. These practical combinations can help narrow the choice.
Fairy room planning checklist
| Room idea | Best position | Supporting details |
|---|---|---|
| Fairy silhouette focal wall | Above a low bed or chest | Plain bedding, stars and one accent colour |
| Woodland fairy corner | Reading or play corner | Leaf shapes, natural textures and a soft lamp |
| Fairy and name display | Above the bed | Personalised lettering and minimal accessories |
| Fairy and unicorn theme | One open feature wall | Clouds, stars and restrained pastel accents |
- Measure the open wall area — exclude furniture, switches and anything that could interrupt the design.
- Choose one focal theme — use a fairy, woodland, personalised or magical-sky direction rather than mixing every idea.
- Test the scale — mark the approximate outer dimensions with small removable paper markers and view them from the doorway.
- Prepare the surface — make sure it is smooth, clean, dry and fully cured.
- Apply carefully — follow the supplied directions and smooth the vinyl steadily onto the surface.
- Add restrained finishing details — repeat one colour or motif through bedding, lighting or storage.
Step-by-step fairy bedroom decorating ideas
1. Pick one clear focal point
Stand in the doorway and identify the wall that naturally catches your eye. This is often the wall behind the bed, although a blank wall beside a reading chair can be equally effective. Avoid choosing a space that is mostly hidden by tall furniture or frequently interrupted by an open door.
If the bed has a tall, decorative headboard, position the fairy design on an adjacent wall instead of forcing it into a narrow gap. A decal needs visible space around it to read as intentional wall art.
2. Choose the right fairy style
Different silhouettes create different moods. A seated or gently flying fairy feels calm and works well near a bed or reading nook. A more energetic pose suits a play area. Designs combined with stars, flowers or dandelion-style details can fill a wider section of wall without requiring extra framed artwork.

For a magical theme with more than one character type, compare unicorn wall stickers. The strongest shared schemes use related shapes and the same vinyl colour, rather than placing several competing large graphics together.
3. Match the decal scale to the furniture
A common mistake is choosing a design based only on its dimensions on a product page. Scale makes more sense when compared with nearby furniture. Above a single bed, the sticker can occupy a noticeable portion of the available width while remaining narrower than the bed. In a reading corner, a taller composition can visually connect a low chair or bookcase with the open wall above it.
Use temporary paper markers to show the outer width and height. Step back to the doorway and check the arrangement from a child’s eye level as well as an adult’s. Leave comfortable breathing room around the entire design.
4. Build a controlled colour palette
Single-colour vinyl gives fairy bedroom schemes a clean outline and helps prevent a magical theme from becoming overly busy. Dark navy looks softer than black while remaining crisp on pale pink, soft grey, muted lilac or white walls. Charcoal works well with dusty rose, sage and warm grey. Black offers the strongest contrast and can suit a more graphic room designed to last into later childhood.
Repeat the vinyl colour in only a few places, such as a cushion edge, lampshade or storage label. Avoid trying to match every accessory exactly; a small amount of variation makes the room feel collected rather than staged.
5. Create a fairy reading corner
A reading corner is a practical alternative when the bed wall is unavailable. Position the fairy decal above a low book rack, beanbag or small chair, keeping the graphic clear of furniture edges. Add a soft lamp, a plain rug and a small selection of books. Leaf, flower or star details can extend the theme without filling the entire wall.
Keep floor-level accessories easy to move and avoid placing cords or unstable decorative objects where children can reach them. The decal should provide the visual detail while the corner remains functional.
6. Add a personalised name feature
A fairy silhouette paired with a child’s name can create a strong bed-wall composition. Use the fairy as the main visual element and keep the lettering simple. The two elements should look connected without touching or overlapping unless they were specifically designed as one layout.
Browse personalised name wall stickers to consider lettering styles and dimensions. Check spelling carefully and use paper templates to test whether the name should sit above, below or beside the fairy.
7. Coordinate the rest of the room lightly
Once the wall feature is planned, add only enough supporting detail to make the theme feel deliberate. Star-shaped cushions, a subtle canopy, woodland bedding or a moon-shaped light can work, but not all at once. Plain curtains and storage help balance more decorative bedding.
If the room already has several playful elements, browse the broader kids’ wall stickers collection for simpler stars, names or shapes that may suit the existing scheme better than a detailed fairy composition.
8. Prepare and apply the wall sticker
Confirm that the surface is smooth, clean, dry and free from loose paint. Allow newly painted walls to cure in line with the paint manufacturer’s guidance. Before applying the sticker, hold or temporarily position its backing sheet against the wall and check the alignment from several viewpoints.
Follow the directions supplied with the decal and work steadily, smoothing the vinyl so that the design sits directly against the wall. The one-colour cut-vinyl format has no printed rectangular background, so the wall shows through any cut-out details and around the design.
Common mistakes to avoid
- Choosing a sticker that is too small: A tiny design can look lost above a bed or on a large feature wall. Compare its dimensions with the furniture below it.
- Placing the decal too high: Fairy details are easier to appreciate when positioned in relation to the bed, chair or storage beneath them, not close to the ceiling.
- Mixing too many fantasy themes: Fairies, unicorns, castles, rainbows and woodland animals can compete if every element is equally prominent. Choose one lead idea and one supporting motif.
- Applying to an unsuitable surface: Rough texture, damp, dust, flaking paint or uncured paint may prevent reliable adhesion.
- Ignoring doors and furniture: Check the full swing of doors and consider whether future furniture changes could cover the design.
- Assuming removal will be identical on every wall: Removal results depend on wall condition, paint quality and how carefully the sticker is removed.
- Overdecorating after the decal is applied: Give the silhouette clear space. Additional framed pictures or shelves can weaken the focal effect.
When to choose a different product or approach
A fairy wall sticker is not always the best solution. Choose framed artwork if the wall is heavily textured, the paint is unstable or you want an item that can move frequently between rooms. A freestanding accessory may be more suitable when decorating temporarily and the wall condition is uncertain.
Consider a personalised name decal without a fairy if the child’s interests change often or the room already contains prominent fantasy bedding. A simple star, moon or geometric design can also have greater longevity in a shared bedroom.
For a very large or irregular wall, several carefully spaced cut-vinyl elements may work better than one compact design. However, resist scattering small shapes randomly. Plan an intentional cluster with consistent gaps and keep the main group connected visually to a bed, desk or reading corner.
Find a fairy design for your room
Whether you are planning a calm reading nook, a personalised bed wall or a magical feature area, begin with the design and scale before buying extra accessories. Browse the fairy wall sticker collection for one-colour self-adhesive designs made for smooth, clean, dry surfaces.
Frequently Asked Questions
What wall colour works best with a fairy sticker?
Pale pink, white, soft grey, muted lilac and light sage can all work well. Choose a vinyl colour with enough contrast to keep the full fairy silhouette clear from across the room.
Where should a fairy wall sticker be positioned?
Popular positions include above a low bed, beside a reading corner or on an uncluttered feature wall. Keep the entire design clear of headboards, shelves, switches and door swings.
Can a fairy sticker be applied to a freshly painted wall?
Fresh paint must cure before a sticker is applied. Drying and curing are not the same, so follow the paint manufacturer’s stated curing guidance and confirm that the surface is clean and dry.
Do fairy wall stickers have a clear background?
Most Apex wall stickers are cut from one-colour vinyl and do not have a clear, white or printed background. The wall remains visible around the silhouette and through cut-out details.
Can I combine fairy and personalised name stickers?
Yes, provided the dimensions, colour and spacing are planned together. Make one element dominant and use temporary paper markers to test the complete arrangement before applying either design.
Ready to shape your room idea? Explore the fairy wall stickers collection and choose a design that fits your available wall space, colour palette and furniture layout.