



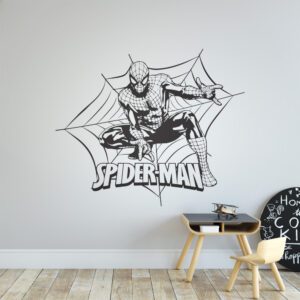


The best Stranger Things wall sticker ideas capture the atmosphere of the series without making your bedroom feel like a crowded merchandise display. Think a strong silhouette on a pale wall, a dark navy and grey colour scheme, and a few carefully chosen retro details. Whether you are updating a teenager’s bedroom, a gaming corner or a film-night space, the aim is to create one clear focal point rather than fill every surface.
This article helps you choose a layout, compare room ideas and plan where to apply your decal. Start with the Stranger Things wall stickers collection to see the available designs, then use your wall size, furniture and preferred atmosphere to narrow the options. Check each product’s dimensions, colour choices and design details before ordering.

Quick answer: what makes a good Stranger Things wall sticker layout?
Choose one main decal, place it above or beside the room’s principal piece of furniture, and leave visible wall around it. A single-colour dark design against white or light grey paint usually gives a stronger result than a busy arrangement surrounded by posters, shelves and competing decorations.
For a bedroom, start with the wall above the bed or a clear section beside it. For a gaming space, use the wall above the desk, allowing enough room for the design to remain visible over the monitor. For a shared living space, a smaller, deliberately placed design may be easier to balance with the rest of the decor.
| Room idea | Best starting point | Main trade-off |
|---|---|---|
| Subtle fan bedroom | One decal with plain bedding and a restrained palette | Less immersive, but easier to live with |
| Retro-inspired bedroom | A focal decal with one or two vintage-style accessories | Needs editing to avoid visual clutter |
| Gaming corner | A clear wall area above or beside the desk | Monitors and shelves can hide the design |
| Film-night space | A side wall visible from the seating | Must complement a shared room |
| Dramatic feature wall | A high-contrast decal on a pale, uncluttered surface | Can dominate a compact room |
What you need before you start
A suitable surface
Apex wall stickers are self-adhesive decals cut from one-colour vinyl. Most have no clear, white or printed background, so the wall shows through the spaces in the design and creates a clean painted-on look. This is different from a printed poster: the existing wall colour becomes part of the finished effect.
Wall stickers work best on smooth, clean, dry surfaces. Rough plaster, heavily textured wallpaper and flaky paint are poor starting points. Surface condition and paint quality affect both application and removal. If you have recently painted, allow the paint to cure according to the paint manufacturer’s guidance before applying a sticker; touch-dry does not necessarily mean fully cured.
Measurements and a realistic viewing position
Measure the usable wall area, not just the whole wall. Deduct space occupied by headboards, shelves, doors and furniture. Note the height of a monitor or desk accessories if you are decorating a gaming corner. A design that looks generous on an empty wall can become partly hidden once the furniture is back in place.
You will need the product’s stated measurements, a tape measure, a simple room sketch and the supplied application instructions. A paper rectangle matching the proposed dimensions can help you judge scale before purchasing. Do not assume a product photograph shows the decal at the exact scale it will have in your room.
A simple colour and mood plan
Pick two or three supporting colours before choosing accessories. Dark navy, white and warm grey create a practical base; a restrained red accent can bring a more dramatic feel without turning the room into a set recreation. If your wall is already dark, check whether the available vinyl colours will create enough contrast.
Also decide how intense you want the room to feel. A space used for sleep and homework may suit a quieter arrangement than a dedicated entertainment room. Let the person using the room help choose the design, especially if they prefer a subtle reference rather than a fully themed bedroom.
Step-by-step: turn your inspiration into a room plan
Your wall sticker planning checklist
- Choose the focal wall — find a smooth, clean, dry area that is visible from the doorway or main seating position.
- Measure the usable space — account for the headboard, monitor, shelving and nearby switches.
- Compare actual product dimensions — use the listed width and height rather than judging from room photographs.
- Test the composition — use a paper size template and view it from several positions.
- Edit the surrounding decor — keep a clear border of wall around the design and limit competing accessories.
- Prepare and apply carefully — check paint curing and surface suitability, then follow the supplied instructions.
1. Choose a mood rather than copying an entire scene
Start with what you enjoy about the series: its retro atmosphere, mysterious setting or dramatic visual contrast. You do not need to reproduce every reference in the same room. Choosing one direction makes it easier to select a decal and stops the accessories from becoming a shopping list of unrelated fan items.
For a subtle room, let the sticker carry the theme while the furniture stays neutral. For a stronger look, repeat one accent colour in a cushion or desk accessory. Keep those accents secondary so the decal still reads as the main feature.
2. Match the idea to how the room is used
Above-bed focal point: centre the design visually on the bed rather than automatically centring it on the entire wall. Leave space above the headboard so the decal does not appear squeezed between furniture and ceiling. Consider where pillows and taller bedding will sit.
Desk-side feature: use a clear section beside the monitor if the area above it is shallow. This can be more effective than choosing a large design that is mostly hidden by screens. Keep shelves and cable storage from breaking up the outline.
Film-night corner: place the decal on a side wall rather than directly competing with the television. A nearby lamp, plain throw and tidy media storage can support the atmosphere without adding more wall graphics.
3. Pick a size that fits the design, not just the wall
Look at both width and height. A wide, shallow design and a tall silhouette can have the same width but feel completely different above a desk. Check whether finer details will be easy to appreciate from your normal viewing distance.
As a planning exercise, try a paper template covering roughly half to two-thirds of the clear width above the furniture. This is not a fixed sizing rule: leave more breathing room for a visually dense design, and adjust to the sizes actually offered. The important test is whether the arrangement feels balanced from across the room.
4. Build contrast with the existing wall
Dark vinyl usually stands out clearly against a pale wall. Because most cut-vinyl designs have no printed background, their open areas reveal your paint colour. This can make the result feel integrated with the room, but it also means a low-contrast pairing may lose important detail.
If the wall is dark navy or charcoal, check the product’s available colour options rather than assuming every design comes in a lighter shade. If there is no suitable option, another wall may be the better choice. Repainting solely to accommodate a decal adds time because the new paint must cure first.
5. Use retro details selectively
A vintage-style bedside lamp, a simple checked textile or a small display of personal memorabilia can suggest the period without making the room feel dated. Choose one or two supporting touches and keep practical items, such as storage and desk lighting, suited to everyday use.
Avoid stacking posters, decorative lights and multiple decals around the same focal point. If you want to keep an existing poster collection, place it on a different wall or use a smaller sticker in a separate zone. Giving each feature its own space usually makes both look more intentional.
6. Prepare the wall and apply the decal
Before applying, check that the surface is sound, clean and fully dry. Follow the supplied preparation and application instructions, including any guidance about transfer material. Plan the position first and take your time with detailed sections rather than treating the decal as something to move repeatedly while experimenting.
Do not assume the sticker can be repositioned or reused unless the individual product information says so. For a larger design, a second person may help with alignment if the instructions recommend it. Keep the product instructions available throughout the process.
Common mistakes to avoid
- Buying from the room photograph alone. Check the listed dimensions and measure your own wall; photographs are inspiration, not a sizing guarantee.
- Choosing too many focal points. A decal, busy bedding, several posters and bright decorative lighting can compete rather than complement one another.
- Ignoring furniture height. Headboards, screens and shelves can conceal the strongest part of a design.
- Using low-contrast colours. A dark sticker on dark paint may look much less defined than expected.
- Applying before paint has cured. Follow the paint manufacturer’s curing guidance, not just the time when the wall feels dry.
- Assuming every wall is suitable. Texture, dust, dampness and weak paint can affect the result.
- Expecting effortless removal. Removal results depend on wall condition, paint quality and how carefully the sticker is removed.
When to choose a different product or approach
A wall decal is a good option when you want a graphic focal point on a suitable surface. It is not the best answer to every decorating problem. If your wall is textured, damp or has unstable paint, address the underlying surface issue or choose decor that does not rely on adhesion to that wall.
| Your priority | Consider instead | Why |
|---|---|---|
| Full-colour scene or photographic detail | A suitable printed artwork format | One-colour cut vinyl is designed for silhouettes and graphic shapes |
| Frequently changing themes | Framed artwork or interchangeable accessories | A decal should not be assumed reusable |
| A broader film-themed room | Film and movie wall stickers | Lets you compare themes beyond one series |
| A room centred on a gaming desk | Gaming wall stickers | May suit the everyday use of the space more closely |
| A shared room with mixed tastes | A more neutral wall sticker design | Easier to coordinate with existing decor |
If you are still deciding on the theme, compare the film and movie wall stickers with the gaming wall stickers collection. For a less fandom-specific option, browse the wider wall stickers collection. Choose for the room you actually use, not only the theme you like in a photograph.
Build your shortlist
Once you know your usable wall size and preferred mood, browse the Stranger Things wall sticker designs and shortlist the options that fit. Compare dimensions, available colours and the amount of detail before deciding. A well-placed design with room around it is usually more effective than the largest sticker you can squeeze onto the wall.


Frequently Asked Questions
How can I create a Stranger Things-themed room without overdoing it?
Use one main wall sticker and keep the surrounding decor restrained. Plain bedding, a limited colour palette and one or two retro-inspired accessories can establish the mood without covering every wall in references.
What wall colour works best with a dark decal?
White, light grey and other pale neutral colours generally provide strong contrast. Check the individual product’s colour options and remember that the wall colour shows through the open spaces in most cut-vinyl designs.
Can I apply a wall sticker to textured wallpaper?
Wall stickers work best on smooth, clean, dry surfaces. Textured wallpaper can prevent consistent contact, and the wallpaper’s finish and condition also matter. Do not assume it is suitable; check the product guidance before purchasing.
Are these wall stickers suitable for rented homes?
Check your tenancy terms and obtain permission where needed. Suitability depends on the surface and paint, not simply whether the home is rented. Removal results depend on wall condition, paint quality and how carefully the sticker is removed.
Should I choose one large sticker or several smaller designs?
One focal design is often easier to balance in a small bedroom or desk area. Several smaller designs can work in separate zones, but plan their spacing first and avoid mixing so many graphics that the room loses a clear focal point.
Ready to plan your room update? Explore the Stranger Things wall stickers collection, check the dimensions against your chosen space, and select a design that suits both your decor and your wall surface.