



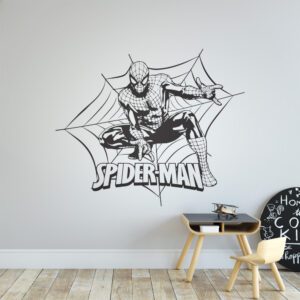


If you are asking why are my wall stickers not sticking, the most likely answer is that the wall surface, paint finish, dust, moisture, fresh paint or application pressure is stopping the vinyl adhesive from bonding properly. Self-adhesive vinyl wall stickers work best on smooth, clean, dry walls, and even a good quality sticker can lift if the wall is not ready.
This troubleshooting guide walks through the most common reasons wall stickers peel, curl or refuse to grip, then shows you what to check before trying again. It is written for Apex-style cut vinyl decals: single-colour self-adhesive wall stickers with no clear, white or printed background, designed to create a clean painted-on look once applied.
Quick Answer: Why Are My Wall Stickers Not Sticking?
Wall stickers usually do not stick because the surface is unsuitable or not fully prepared. The biggest causes are dusty walls, freshly painted walls that have not cured, low-quality or stain-resistant paint, textured surfaces, damp rooms, cold walls, residue from cleaning products, or not enough firm pressure during application.
Before replacing the sticker, check the wall first. If the vinyl is clean and undamaged, you may be able to improve the result by cleaning the wall correctly, letting it dry fully, warming the room slightly, and pressing the sticker down slowly from the centre outward. For a full method, see our quick and easy wall sticker application guide.
| Symptom | Most likely cause | Best next step |
|---|---|---|
| Edges lifting after a few hours | Dust, grease, cold wall or low pressure | Clean, dry, warm slightly and press firmly again |
| Sticker will not grab at all | Fresh paint, textured paint or resistant finish | Wait for paint to cure or choose another surface |
| Small details stay on the transfer tape | Not enough squeegee pressure before applying | Rub the transfer tape firmly before peeling |
| Vinyl lifts on corners only | Uneven wall texture or air trapped near edges | Smooth from centre out and press corners carefully |
What You Need Before You Start
Before troubleshooting, gather a few basic items. You do not need specialist tools, but you do need patience and a clean surface.
- A clean, dry cloth for removing dust from the wall.
- A flat plastic card or squeegee to press the vinyl down evenly.
- Low-tack masking tape for positioning larger designs before applying.
- Time for the wall to dry after any cleaning.
- A suitable room temperature; very cold walls can reduce adhesive tack.
- Optional surface prep, such as StickFix vinyl sticker surface prep for matt or silk walls, if your paint finish needs help accepting vinyl.
If you are planning a new room update and have not chosen your design yet, browse the wall stickers collection and check that your chosen surface is smooth, clean and dry before applying.
Step-by-Step Instructions to Fix Wall Stickers That Are Not Sticking
Work through these checks in order. Do not keep peeling and re-pressing the same area repeatedly, as this can weaken the adhesive or stretch delicate vinyl details.
Troubleshooting checklist
- Check the wall texture — vinyl bonds best to smooth walls, not heavily textured, dusty or flaky surfaces.
- Confirm the paint has cured — freshly painted walls need time before stickers are applied.
- Clean and dry the surface — remove dust, grease and cleaning residue, then let the wall dry fully.
- Warm the room slightly — avoid applying to a very cold wall or in damp conditions.
- Press firmly and slowly — smooth from the centre outward and pay attention to edges and small details.
- Choose another surface if needed — glass, mirrors, smooth doors or sealed furniture can sometimes work better than a problem wall.
1. Check Whether the Wall Is Too Textured
Vinyl wall stickers need surface contact to grip. On a smooth painted wall, the adhesive can sit flat against the paint. On a textured wall, only the high points touch the adhesive, leaving tiny gaps underneath. This makes edges and fine details more likely to lift.
Run your hand gently over the wall. If it feels bumpy, gritty, sandy, stippled or uneven, that may be the reason your wall stickers are not sticking. Light orange-peel texture may sometimes work, but heavy texture is risky. If the design has thin lettering, stars, dots or delicate shapes, texture becomes even more important.
2. Make Sure the Paint Is Fully Cured
Fresh paint can feel dry to the touch long before it has cured properly. During curing, paint can still release moisture or chemicals that reduce adhesion. Applying a vinyl sticker too soon may cause it to lift, bubble, or fail to bond.
If the wall was painted recently, wait before trying again. Paint type, room temperature and ventilation all affect curing time, so follow the paint manufacturer’s guidance. As a practical rule, the safer choice is to allow extra time rather than rush the application.
3. Remove Dust, Grease and Cleaning Residue
Dust is one of the most common hidden causes of peeling wall stickers. A wall can look clean but still have a fine layer of dust, especially after decorating, sanding, building work or moving furniture. Kitchens, playrooms and busy hallways may also have grease, fingerprints or polish residue.
Wipe the area with a clean, dry cloth first. If the wall needs more cleaning, use a mild method and avoid anything that leaves a film. Do not apply the sticker while the wall is damp. Let it dry completely before you try again.
4. Check the Paint Finish
Some modern paints are designed to resist stains, moisture or marks. That can be useful for everyday living, but it can also make the wall less friendly to self-adhesive vinyl. Very chalky matt paint, washable paint, low-VOC paint, heavily pigmented paint or specialist stain-resistant paint can all affect the bond.
If your sticker is lifting despite a smooth, clean and dry wall, the paint finish may be the issue. In that case, a surface preparation product may help. Apex offers StickFix for matt or silk walls, which is designed to help prepare certain painted surfaces before applying vinyl stickers.
5. Press the Sticker Firmly Before and During Application
Cut vinyl decals are normally supplied with transfer tape to hold the design in position. If the vinyl has not been rubbed firmly enough before peeling the backing paper, small details may stay behind or fail to transfer cleanly.
Place the sticker flat on a hard surface and rub across the transfer tape with a squeegee or plastic card before applying. Once on the wall, press from the centre outward. Work slowly, especially around corners, thin lettering and small shapes. Firm, even pressure helps the adhesive make full contact with the wall.
6. Avoid Damp, Cold or Steamy Rooms
Adhesive performs best in normal indoor conditions. A very cold wall can make the vinyl less flexible and reduce initial tack. Damp walls, condensation or steam can also interrupt the bond. Bathrooms, utility rooms and poorly ventilated spaces need extra care.
If the wall feels cold, let the room warm up before applying. If the room is damp, improve ventilation and wait until the surface is completely dry. Do not apply a sticker over mould, flaking paint or damp patches.
7. Try a Small Test Area if You Are Unsure
If you are not sure whether your wall is suitable, test a small offcut or less visible section first where possible. This is especially useful on unusual paint finishes, older walls or rented homes. It gives you a better idea of how the vinyl behaves before committing to a large feature design.
For more help choosing the right design, size and surface, our wall sticker buying guide explains the practical points to check before ordering.
Common Mistakes That Stop Wall Stickers Sticking
Most sticker problems come from preparation rather than the sticker itself. These are the mistakes to avoid.
Applying to Fresh Paint Too Soon
This is one of the biggest causes of failure. A freshly decorated wall may look ready, but the paint underneath may still be curing. Wait longer than you think you need to, especially with thick coats, dark colours or rooms with poor airflow.
Using Harsh Cleaning Products Before Applying
Some cleaners leave behind residue that can block adhesion. Polishes, sprays, oils and strong household cleaners are especially risky. If you clean the wall, keep it simple and make sure no film is left behind.
Applying Over Dust from Decorating
Fine dust from sanding or DIY work can settle on walls and skirting boards. If you have recently decorated, wipe the wall carefully and allow the room to settle before applying any vinyl.
Touching the Adhesive Too Much
Fingerprints, skin oils and repeated handling can reduce stickiness. Try to handle the transfer tape and backing paper rather than the adhesive side of the vinyl.
Rushing the Transfer Tape
If you pull the transfer tape away too quickly, small parts of the sticker may lift with it. Peel the transfer tape back slowly and close to the wall, rather than pulling it straight out towards you.
When to Choose a Different Product or Approach
Sometimes the best fix is not to keep forcing the same sticker onto the same wall. If the surface is unsuitable, choosing a different location or approach can save frustration.
| Situation | Best option | Trade-off |
|---|---|---|
| Heavily textured wall | Use a smoother surface such as a door, wardrobe, mirror or glass panel | The design may move away from the original feature wall plan |
| Freshly painted room | Wait for the paint to cure before applying | You need patience, but the result is more reliable |
| Problem matt or silk paint | Use a suitable surface prep product before applying | Extra step, but may improve adhesion on difficult paint |
| Damp or steamy room | Choose a drier, better ventilated location | Less exposure to moisture, but different room placement |
| Rented property with delicate paint | Test first or choose a removable display surface | More cautious, but reduces risk of unwanted marks |
Wall stickers can be a simple way to personalise a room, but they are not suitable for every wall. Surface condition and paint quality affect application and removal. If you later remove a sticker, remember: Removal results depend on wall condition, paint quality and how carefully the sticker is removed.
Should You Reuse a Wall Sticker That Has Lifted?
In most cases, self-adhesive vinyl wall stickers are designed for one main application. If a sticker has only lifted slightly at the edge and the adhesive is still clean, you may be able to press it back down. If it has collected dust, stretched, folded over on itself or been removed fully, it may not apply neatly again.
For a large decal, it is usually better to solve the surface issue before trying to reapply any loose area. Pressing the same section again and again without fixing the cause often leads to more lifting.
Frequently Asked Questions
Why are my wall stickers not sticking to matt paint?
Some matt paints are chalky, powdery or designed to resist marks, which can make it harder for vinyl adhesive to bond. Make sure the wall is clean, dry and fully cured. If the paint is the issue, a surface prep product may help.
Can I apply wall stickers to freshly painted walls?
You should wait until the paint has cured before applying wall stickers. Paint can be touch-dry but still not ready for vinyl. Follow the paint manufacturer’s curing guidance and allow extra time if the room is cool or poorly ventilated.
Will heat help a peeling wall sticker stick again?
A slightly warmer room can help vinyl become more flexible, but avoid overheating the sticker or wall. Gentle room warmth and firm pressure are safer than using strong direct heat.
Can wall stickers go on textured walls?
They work best on smooth, clean, dry surfaces. Light texture may sometimes be acceptable, but heavy texture reduces contact between the adhesive and wall, so peeling is more likely.
What should I do if the sticker keeps lifting?
Stop re-pressing it repeatedly and check the surface. Look for dust, damp, fresh paint, textured paint or a resistant finish. If the wall is unsuitable, choose a smoother surface or prepare the wall before trying another sticker.
Final Advice and Next Step
If your wall sticker is not sticking, do not assume the design is faulty straight away. Start with the wall: check texture, paint age, cleanliness, dryness, temperature and application pressure. Most adhesion problems come from one of these areas.
If you are ready to try again, follow our step-by-step wall sticker application method for a cleaner, smoother result. It is the most useful next guide if you want to apply a vinyl wall sticker with less lifting, bubbling or transfer tape trouble.